🌐 Developing a Pluto Application Online
We have established an online development environment for Pluto using the online IDE provided by CodeSandbox (opens in a new tab), which comes pre-installed with essential dependencies like AWS CLI, Pulumi, and Pluto, including a sample Pluto application. You can develop Pluto applications directly in your browser or connect to the online environment remotely via VS Code, without the need to install any software.
Here, we offer two template applications in TypeScript and Python, allowing you to choose based on your needs.
- TypeScript Template Application | CodeSandbox (opens in a new tab)
- Python Template Application | CodeSandbox (opens in a new tab)
Next, using AWS as an example, we'll introduce the basic process of developing Pluto applications online.
Create
Choose between the TypeScript or Python template application according to your needs and click the link to enter the CodeSandbox online IDE. Once open, you should be in template sync mode. Please click the Fork button on the top right corner of the screen to create your own development environment.

Configure
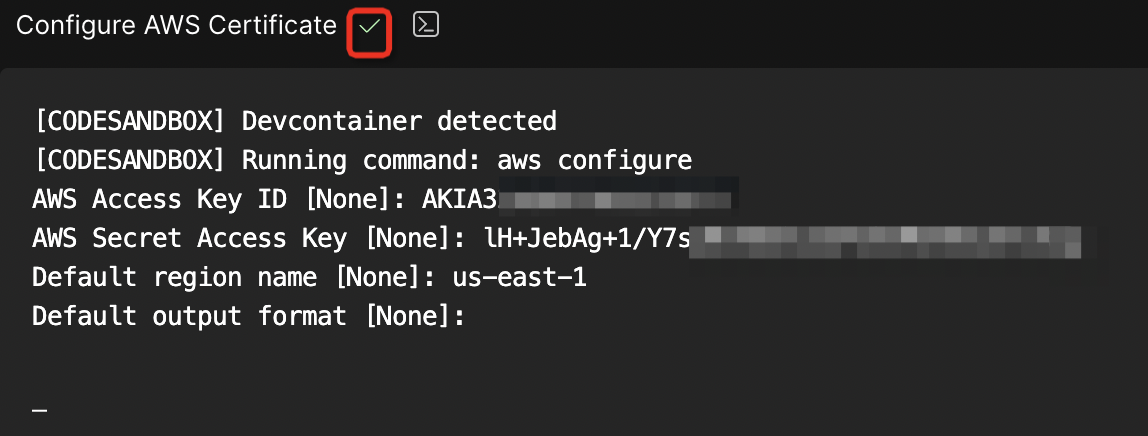
After entering your development environment, a Configure AWS Certificate tab will automatically pop up in the console below. Please enter your AWS certificate information here to ensure the application can be successfully deployed to AWS. You can leave the output format field blank. After filling in the other necessary information, if everything is correct, you should see a green check mark ✔️ next to the tab name.

Code
Now, you can start writing your application code in the src/index.ts or app/main.py file.
This file already contains some sample code to help developers understand the basic way of writing code in Pluto. Please modify the code according to your specific needs.
Deploy
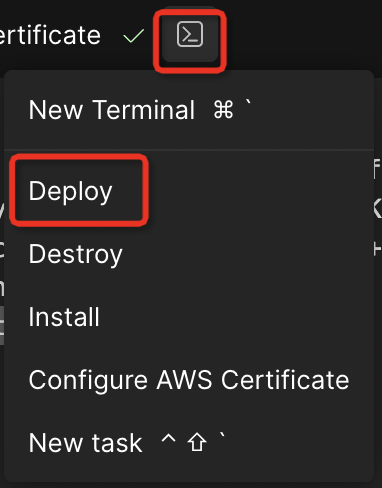
After completing your code, you can click on the terminal icon and select Deploy from the menu. Your application can then be deployed directly to AWS with just one click, without requiring any additional steps. After the deployment, you can see the access address of the application in the output.

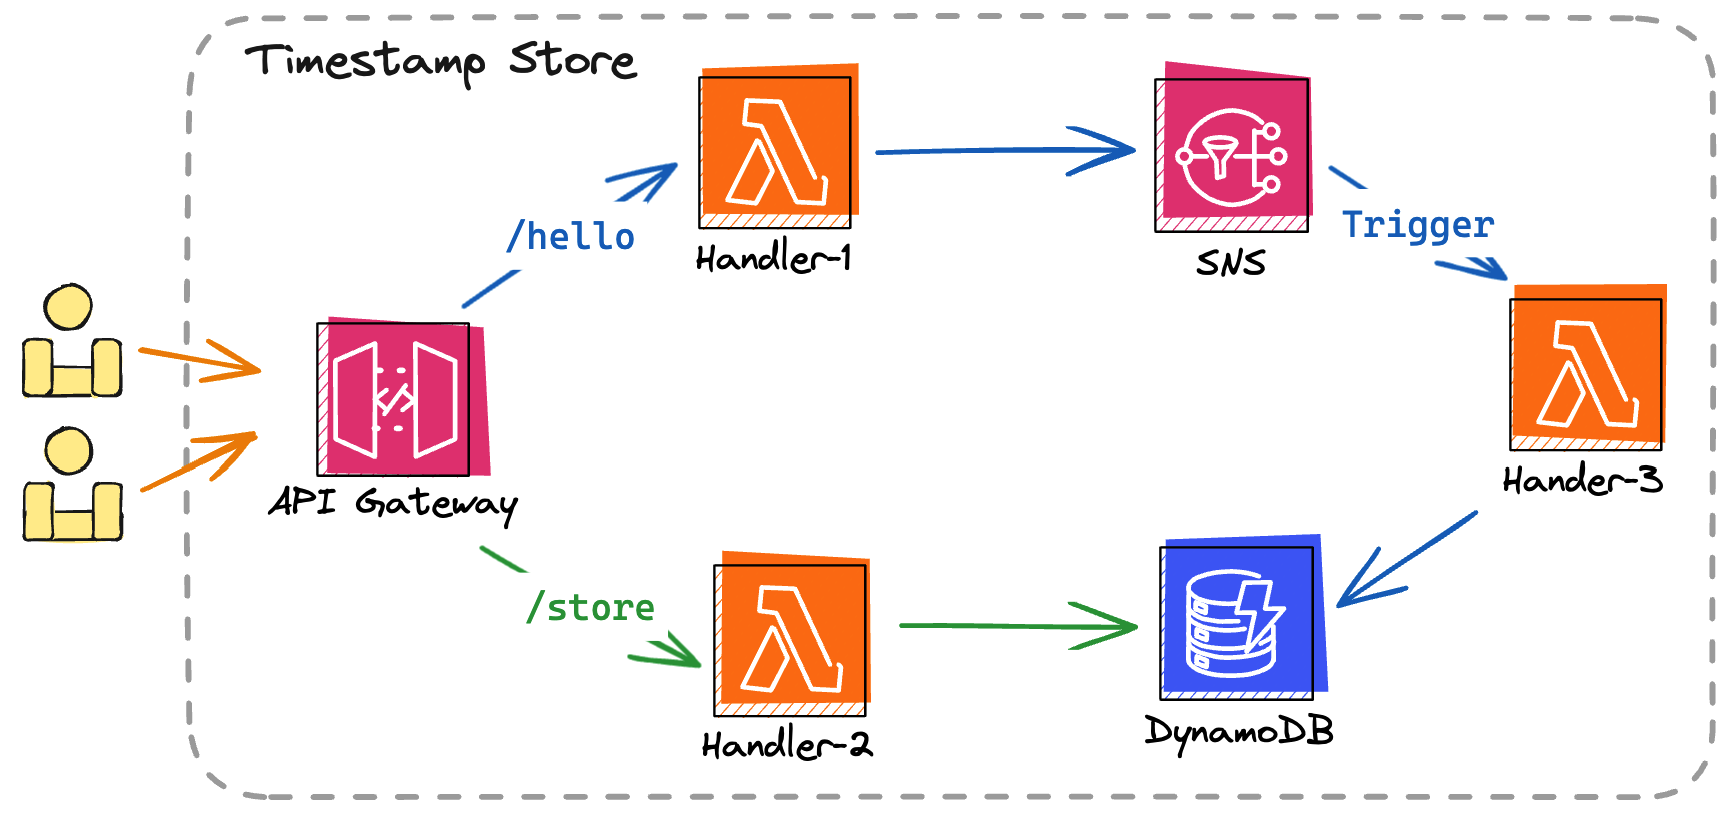
You can find out what resources Pluto has specifically deployed from the Details.
Test
You can now open a new terminal and execute the following two commands consecutively to test if the service is working properly. Here, https://fvz3jhc4z2.execute-api.us-east-1.amazonaws.com/dev is the access address outputted at the end of Pluto deployment, which needs to be fully replaced with the access address you've obtained:
curl https://fvz3jhc4z2.execute-api.us-east-1.amazonaws.com/dev/hello
curl https://fvz3jhc4z2.execute-api.us-east-1.amazonaws.com/dev/store
If the deployment was successful, you should see an output similar to the following:

Clean Up
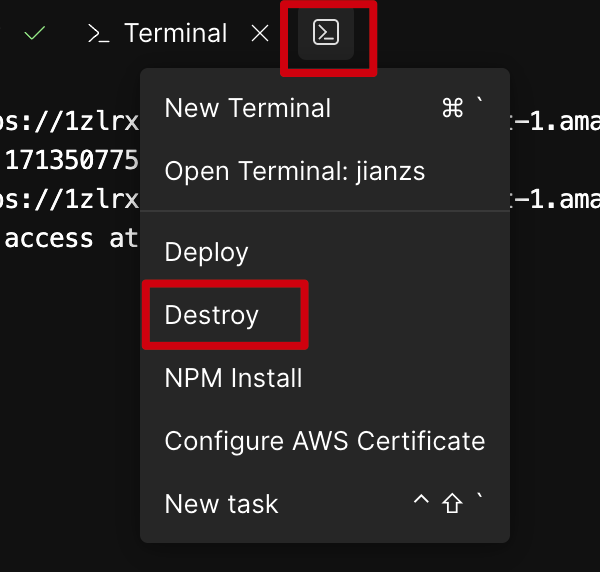
If you wish to take your application offline, simply click Destroy from the menu, and the configured resources will be completely removed.

- If you want to deploy your application to multiple platforms simultaneously, you can refer to the Multi-Platform Deployment documentation.
- If you're interested in exploring more examples of Pluto applications, you can check out the Cookbook documentation.
Details
During the deployment process, Pluto will deduce that it needs one route, one message queue, one KV database, and three function objects from the application code. Then, Pluto will automatically create the corresponding resource instances on your specified cloud platform and configure their dependencies.

If the target platform is AWS, Pluto will create one API Gateway, one SNS topic, one DynamoDB, and three Lambda functions while configuring triggers, roles, permissions, etc.